

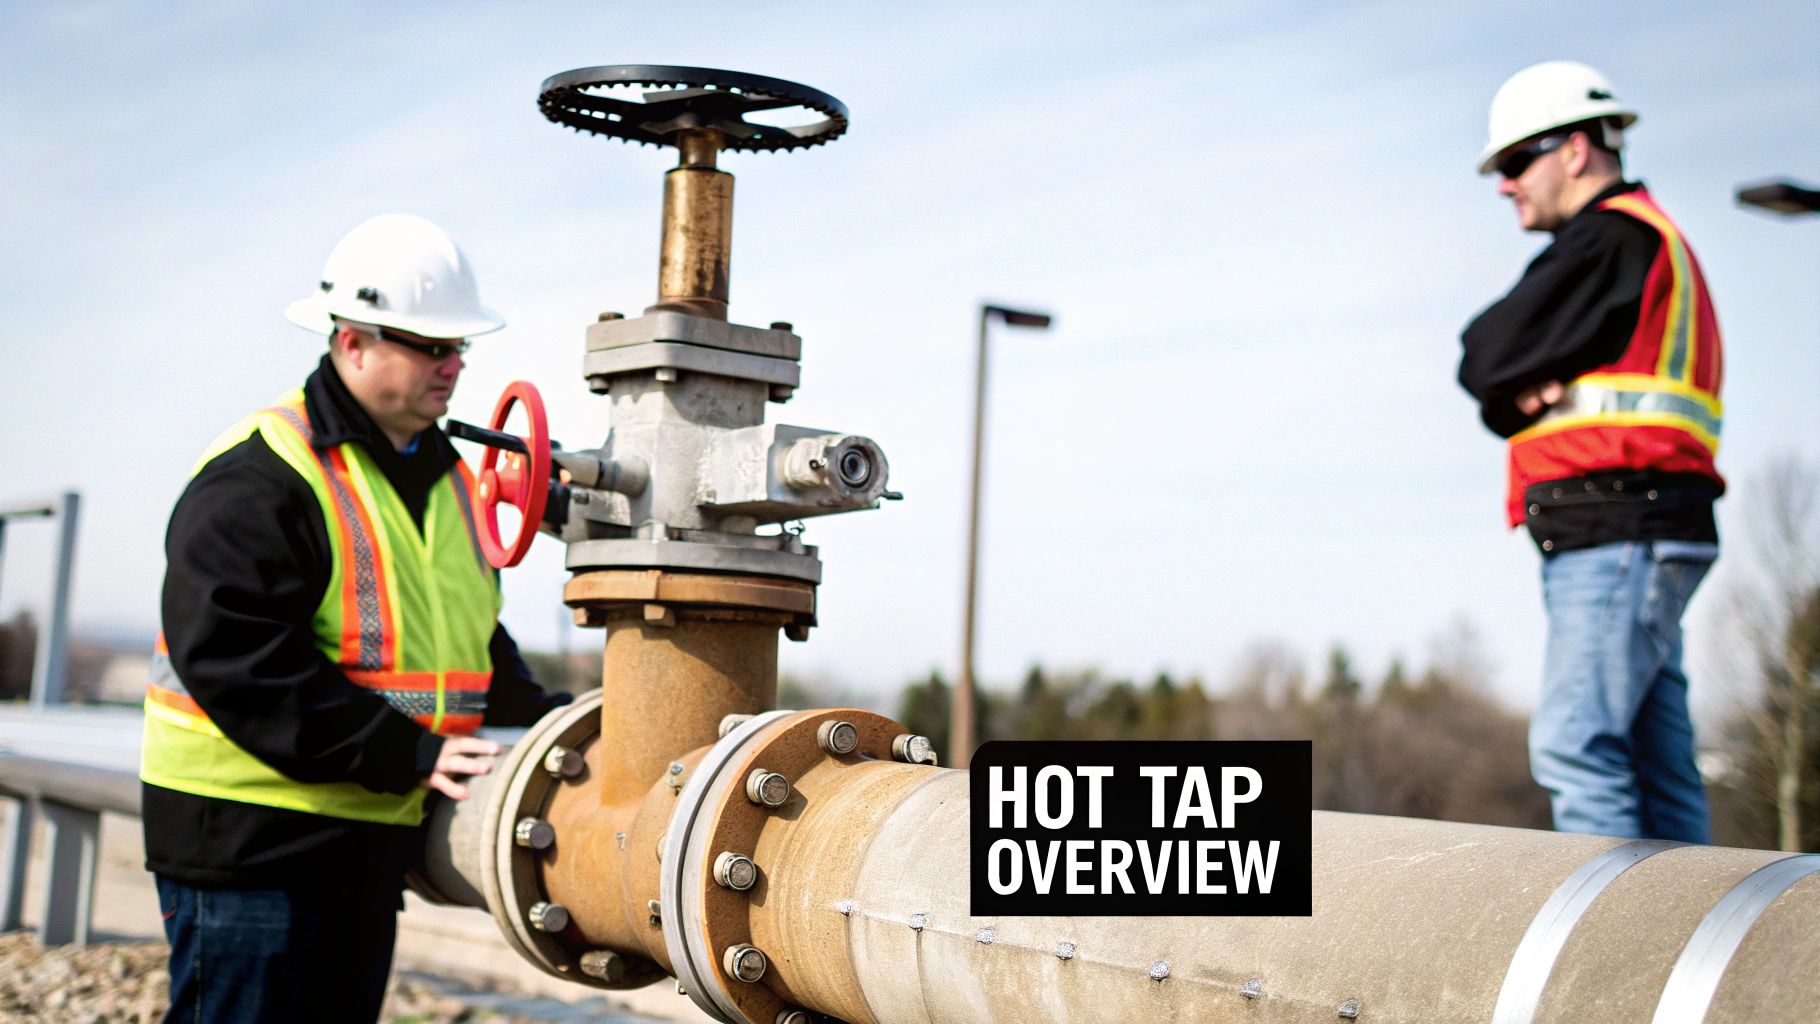
A split tee hot tap is an ingenious bit of engineering. It lets us create a brand-new branch on a live, pressurized pipeline without ever shutting it down. Think about that for a second. We're talking about cutting into a pipe that's actively carrying gas, water, or oil.
This method is an absolute lifesaver for avoiding costly, disruptive shutdowns. The core idea is to weld a special two-piece fitting—the split tee—around the live pipe. Once that’s in place, we use a specialized tapping machine to drill right through the pipe wall, creating the new connection while the system stays fully operational.
Breaking Down the Hot Tap Process
When keeping a pipeline running is non-negotiable, the split tee hot tap is the go-to solution. Picture this: a busy manufacturing plant needs another production line, which requires a new natural gas feed. Shutting down the main supply to weld in a traditional tee would halt the entire factory, racking up huge financial losses. Hot tapping avoids all that.
Or consider a city water utility extending a main to a new housing development. Taking the whole line out of service would cut off water to hundreds of homes. Instead, crews can use a split tee hot tap to add the new connection seamlessly, and the residents' taps keep flowing without interruption.
The Key Players: Core Components and Their Jobs
Getting a hot tap done right comes down to three critical pieces of equipment working together perfectly. Each part has a specific role in creating a sealed, controlled environment for safely breaching a pressurized pipe.
- The Split Tee Fitting: This is the foundation of the whole operation. It’s a custom-made fitting, built in two halves, that gets bolted and then welded completely around the parent pipe. It features a flanged outlet that serves as the new connection point. Every fitting has to be engineered to precise standards, like ASME B31.8 for gas lines, to safely handle the pipeline's pressure and temperature.
- The Isolation Valve: With the split tee welded firmly in place, a full-bore valve (usually a gate or ball valve) is bolted to its flange. This valve is our primary gatekeeper, ready to contain the pipeline’s contents the moment the tap is complete. It stays shut until the tapping machine is mounted and the crew is ready to cut.
- The Tapping Machine: This is the specialized tool for the job. It mounts directly onto the isolation valve and contains a long boring bar tipped with a pilot drill and a heavy-duty cutter. The machine is designed to advance the cutter through the open valve and into the pipe wall, all while maintaining a perfect, pressure-tight seal.
Where It's Used in the Real World
The sheer versatility of the split tee hot tap procedure makes it indispensable across dozens of industries. It's a critical process in high-stakes environments like oil and gas platforms, where every minute of downtime is incredibly expensive.
You’ll also see it used for:
- Adding new service lines for homes and businesses.
- Installing bypass loops so a section of pipe can be taken offline for maintenance.
- Placing sensors, probes, or sampling points for system monitoring.
- Creating access points for line-stopping equipment to isolate a specific pipeline section.
The Bottom Line: A split tee hot tap is all about precision engineering under live pressure. It’s a carefully planned and flawlessly executed procedure that turns a high-risk challenge—cutting into a live pipeline—into a safe, routine industrial task. The result? No downtime and perfect operational continuity.
Critical Planning for a Successful Hot Tap
Anyone who's been on a split tee hot tap job knows the truth: the real work happens long before you ever strike an arc. I'd say a successful tap is 90% preparation and just 10% execution. This isn't just paperwork; it's the rigorous, detailed planning that turns a potentially high-risk operation into a controlled, predictable process.
Getting this part right is about protecting your crew, the pipeline's integrity, and the entire project's success. Cutting corners here isn't an option. It's often the single thing that separates a smooth, seamless connection from a costly, dangerous failure.
The first thing on the ground is a full-blown site assessment. This is way more than a quick walkthrough. You're digging into the pipeline's entire history and its current state. Your team has to verify every last detail—the parent pipe's material, its precise diameter, and its live operating pressure and temperature. Old schematics are a good place to start, but you absolutely have to put eyes on the pipe and confirm everything in the field.
Verifying Pipeline Integrity
You can't tap what you don't fully understand. The most critical part of this whole planning phase is confirming the pipeline's health right where you intend to make the cut. That pipe wall has to be strong enough to handle the new fitting, the heat from welding, and the stress of the cutting process.
This is where you bring in the technology. Non-destructive testing (NDT) isn't optional; it's a must.
- Ultrasonic Testing (UT): This is your best friend for getting an exact measurement of the pipe's wall thickness. A UT device sends sound waves into the steel, and how long they take to bounce back tells you the thickness with pinpoint accuracy. It's also brilliant for finding hidden problems like internal corrosion or laminations that could kill the job.
- Material Verification: Using a Positive Material Identification (PMI) gun confirms the pipe's exact alloy composition. This is non-negotiable because it ensures your welding procedure and the new split tee fitting are perfectly compatible. A mismatch here can lead to a failed weld, and that's a nightmare you don't want.
A complete understanding of the pipeline's condition is paramount. Sometimes, advanced tools like plumbing camera inspections can give you a look inside, revealing details that even NDT might miss and providing a full picture of the pipe's internal health.
Developing a Comprehensive Work Plan
Once you're confident in the pipe's condition, it's time to build out a detailed work plan. Think of this as the playbook for the entire operation. It should leave zero room for guesswork and lay out every single phase, from moving equipment onto the site to the final cleanup.
A solid work plan absolutely must include:
- Personnel Roles and Responsibilities: Who's in charge? Define the project manager, lead welder, tapping tech, and safety officer. Everyone needs to know their role and who to report to.
- Equipment List: Get specific. List the exact model of the tapping machine, the valve, the welding rigs, and all NDT gear. No substitutions without approval.
- Emergency Protocols: What's the plan if you get a leak? What if the cutter shatters mid-cut? You need a detailed emergency response plan—including shutdown procedures and who to call—that everyone on site has read and understood.
A well-documented plan is more than a checklist. It's a shared mission that gets the whole team aligned on safety, procedure, and the final goal. It guarantees every single person knows what to do, especially when things don't go as planned.
Selecting the Right Equipment
The last piece of the planning puzzle is picking the right hardware. Not all split tee fittings, valves, or tapping machines are built the same. Your selection has to be perfectly matched to the pipeline's specific operational demands.
Imagine you're about to tap a high-pressure natural gas line. The split tee fitting must have a pressure rating that significantly exceeds the line's MAOP (maximum allowable operating pressure). The valve has to be a full-bore design so the cutter and the coupon (the piece of pipe that's cut out) can be retrieved without getting stuck.
And the tapping machine itself? You have to choose it based on the tap's size and the pressure it will be fighting against. A machine built for a low-pressure water line would fail catastrophically on a high-pressure gas system. This careful, meticulous matching of equipment to the application is the foundation of a safe and successful split tee hot tap procedure.
Meeting Essential Design and Compliance Standards
In any high-stakes pipeline operation, standards aren't just suggestions—they are the bedrock of safety and reliability. A split tee hot tap is governed by a strict framework of engineering codes that dictate everything from the steel composition of the fitting to the exact welding process. These aren't just arbitrary rules; they're hard-won lessons from decades of pipeline engineering, designed to prevent catastrophic failures.
For any team taking on a hot tap, getting a handle on this regulatory landscape is non-negotiable. It's how you ensure the new connection isn't just functional, but is engineered with a high margin of safety, capable of withstanding the pipeline's operational stresses for years to come. From the first design calculation to the final installation, every single step is benchmarked against proven industry standards.
Core Pipeline Codes and Specifications
At the heart of any split tee design, you’ll find codes established by the American Society of Mechanical Engineers (ASME). These documents provide the essential playbook for creating fittings that can safely tie into existing high-pressure systems. Two of the most critical standards we live by are ASME B31.4 for liquid pipelines and ASME B31.8 for gas transmission systems.
Following these codes is paramount. They lay out the minimum requirements for material strength, wall thickness calculations, and the fitting's overall structural integrity. This is how we guarantee the new branch connection can handle the pipeline’s maximum allowable operating pressure (MAOP) without putting the parent pipe at risk.
Take the design of the split tee itself. The specifications are incredibly detailed. According to key procurement specifications for pipeline split tees, these fittings are manufactured in two halves for a reason—so they can be mounted on a live pipeline. This design cleverly avoids the need for post-weld heat treatment (PWHT), which could damage the live pipe, by strictly limiting the fitting's wall thickness to under 32 mm.
Key Takeaway: Compliance isn't about checking a box. It's about tapping into a collective body of engineering knowledge to ensure every split tee fitting is robust, reliable, and perfectly suited for the demands of the live pipeline it’s about to become a permanent part of.
Navigating Special Environmental Conditions
Pipelines don't all live in the same world. What's inside the pipe can throw some serious curveballs, demanding even more stringent compliance. One of the biggest challenges we face is "sour service"—a term for environments containing wet hydrogen sulfide (H2S), which is incredibly corrosive to steel.
When you're running a split tee hot tap procedure on a line in sour service, ISO 15156 isn't optional; it's mandatory. This international standard spells out the specific material requirements needed to fight back against sulfide stress cracking, a nasty form of corrosion that can cause sudden, brittle failure.
To meet these tough requirements, manufacturers have to follow a very specific script. This usually involves:
- Specialized Material Selection: Using carbon and low-alloy steels with tightly controlled hardness levels to make them less susceptible to cracking.
- Rigorous Testing: Running extra hardness tests and other NDT methods to prove the material is truly fit for sour service.
- Traceability: Keeping meticulous records for every piece of material used, ensuring you can trace it all the way back from the installation to the steel mill.
Cutting corners on these standards in a sour gas environment could be disastrous, leading to leaks, environmental damage, and unacceptable safety risks. That's why confirming compliance is one of the very first things we do in the planning phase. This meticulous attention to detail is what makes the whole procedure a safe and viable engineering solution.
The On-Site Split Tee Hot Tap Execution
With all the planning, paperwork, and safety checks behind us, it's time to get hands-on with the pipeline. This is where the real work begins—translating a carefully engineered plan into a flawless new connection on a live, pressurized system. Every move from here on out is deliberate, building on the last to ensure a safe and permanent tie-in without a single service interruption.
It all starts with welding the split tee fitting directly onto the parent pipe. This isn't just tacking on a piece of metal; it's a structural operation that requires serious skill. Certified welders, working from an approved welding procedure specification (WPS), lay down precise, multi-pass welds to forge a bond that's as strong as the original pipe. The goal is to make the fitting an integral, leak-proof part of the pipeline.
Creating the Permanent Seal
Before a single hole is drilled, we have to be 100% certain that the new fitting is completely sound. That's where the pressure test comes in. We seal off the space between the split tee, the new valve, and the pipe wall, then fill it with a test medium like water.
The assembly is then pressurized to 1.5 times the pipeline’s maximum operating pressure. This test is the ultimate gatekeeper—it verifies the integrity of every single weld and flange gasket. Only after a successful test, with zero pressure drop, do we get the green light to proceed.
The infographic below shows how a successful field operation relies heavily on the quality of the upfront design and fabrication work.
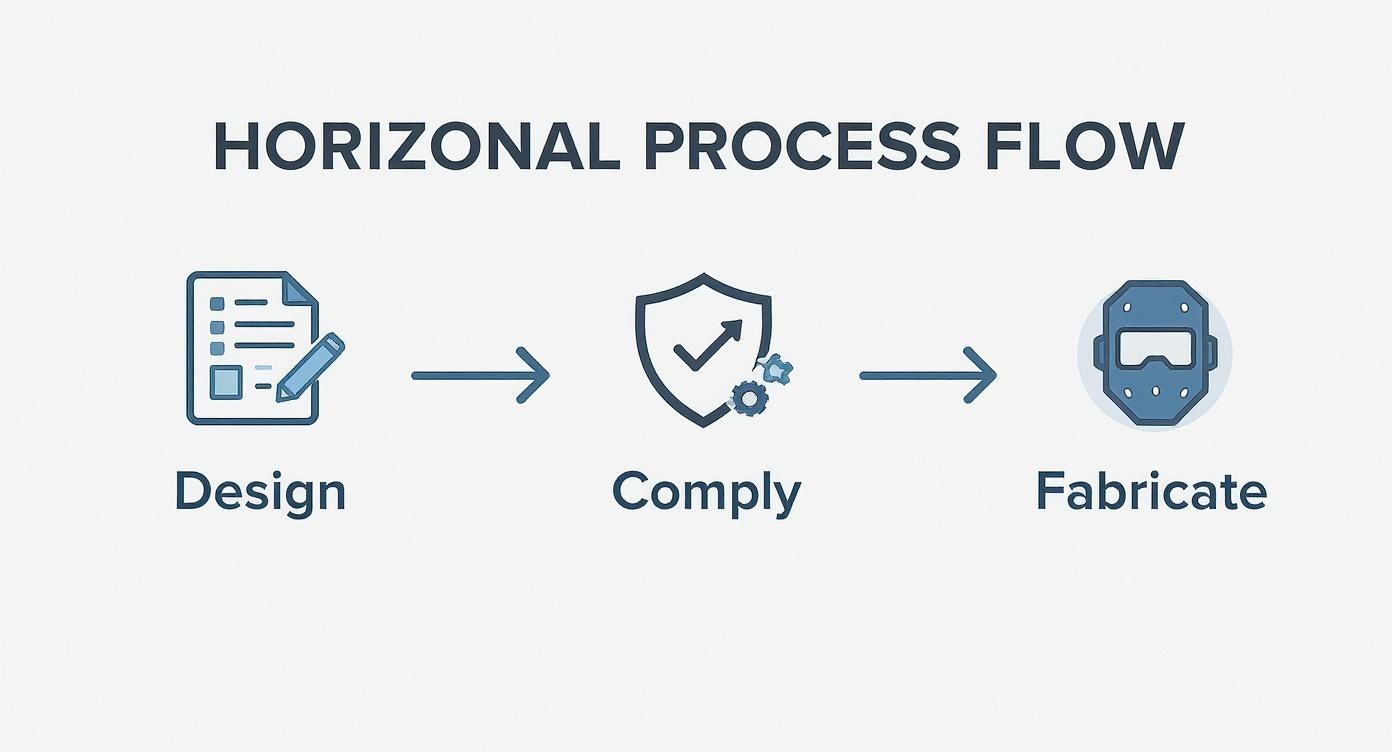
This just goes to show that what happens on-site is only as good as the prep work that came before it. A well-designed, expertly fabricated fitting is the foundation for a safe and successful tap.
Mounting the Tapping Machine
Once the valve is proven to hold pressure, we bring in the main piece of equipment: the tapping machine. It’s carefully lifted and bolted directly onto the valve’s flange. This specialized machine is engineered to drill into the pipe while safely containing its internal pressure.
The technician then opens the valve, creating a straight shot for the machine’s cutter to reach the pipe wall. The boring bar, which holds both the cutter and a pilot drill, is advanced by hand until it just touches the pipe. This simple step is crucial for confirming alignment and getting a feel for the setup before the real work starts. Finally, air is bled from the machine's housing via a purge valve—an essential safety measure to remove oxygen, especially on natural gas lines.
The table below breaks down the key phases of the procedure, highlighting the critical actions and safety checks at each stage.
Hot Tap Procedure Phases and Key Actions
| Phase | Key Actions | Safety Checkpoint |
|---|---|---|
| Preparation | Weld split tee to pipe. Mount valve. | Visual weld inspection. NDT of welds. |
| Pressure Test | Isolate and pressurize the new fitting assembly. | Confirm no pressure drop over a set time. |
| Machine Setup | Mount tapping machine. Open valve. Bleed air. | Check flange bolt torque. Verify air is purged. |
| The Cut | Advance pilot drill, then the main cutter. | Monitor pressure gauges and machine feedback. |
| Coupon Retrieval | Fully retract the cutter and captured coupon. | Ensure coupon is securely held by the pilot drill. |
| Completion | Close the main valve. Depressurize and remove the machine. | Verify valve is fully closed and holding pressure. |
Following these steps methodically is the key to a safe and successful operation every time.
Performing the Cut and Retrieving the Coupon
Now for the main event. With the tapping machine powered on, the pilot drill starts turning and bites into the steel. The pilot is more than just a centering tool; it's also designed to catch the piece of pipe—the "coupon"—that gets cut out. The moment the pilot drill breaks through, the pipeline's product floods the machine housing, equalizing the pressure.
From there, the main cutter is advanced slowly and deliberately. An experienced operator listens to the machine, feels the feedback, and watches the gauges to ensure a smooth, clean cut. You can't rush this. Trying to go too fast can damage the cutter, score the far side of the pipe, or worse.
Proof of Success: The moment the cut is complete, the machine is advanced slightly to confirm a clean break. The successful retrieval of the cut-out section, known as the "coupon," is non-negotiable proof that a full-bore opening has been created.
The tapping machine's pilot drill has U-wires or a similar retaining device that grabs the coupon securely. The entire assembly—cutter, pilot, and the captured piece of pipe—is then slowly retracted back through the open valve.
Once the cutter is clear, the main isolation valve is shut, sealing the new connection from the live pipeline. The pressure in the tapping machine is then safely bled off. Only then can the machine be unbolted and removed, leaving behind a brand-new branch connection.
The split tee hot tap procedure is a game-changer for modifying pipelines without shutting them down. For instance, one major project required welding two 30-inch split tees for mid-line isolation and two 24-inch fittings for a bypass. This allowed for a critical pipeline intervention to happen with zero interruption to production. You can read more about this complex pipeline intervention project to see just how powerful this technique can be.
From the first weld to the final valve closure, a successful hot tap is a testament to meticulous engineering and skilled fieldwork. The result is a fully functional connection, added to a live system without a single moment of downtime.
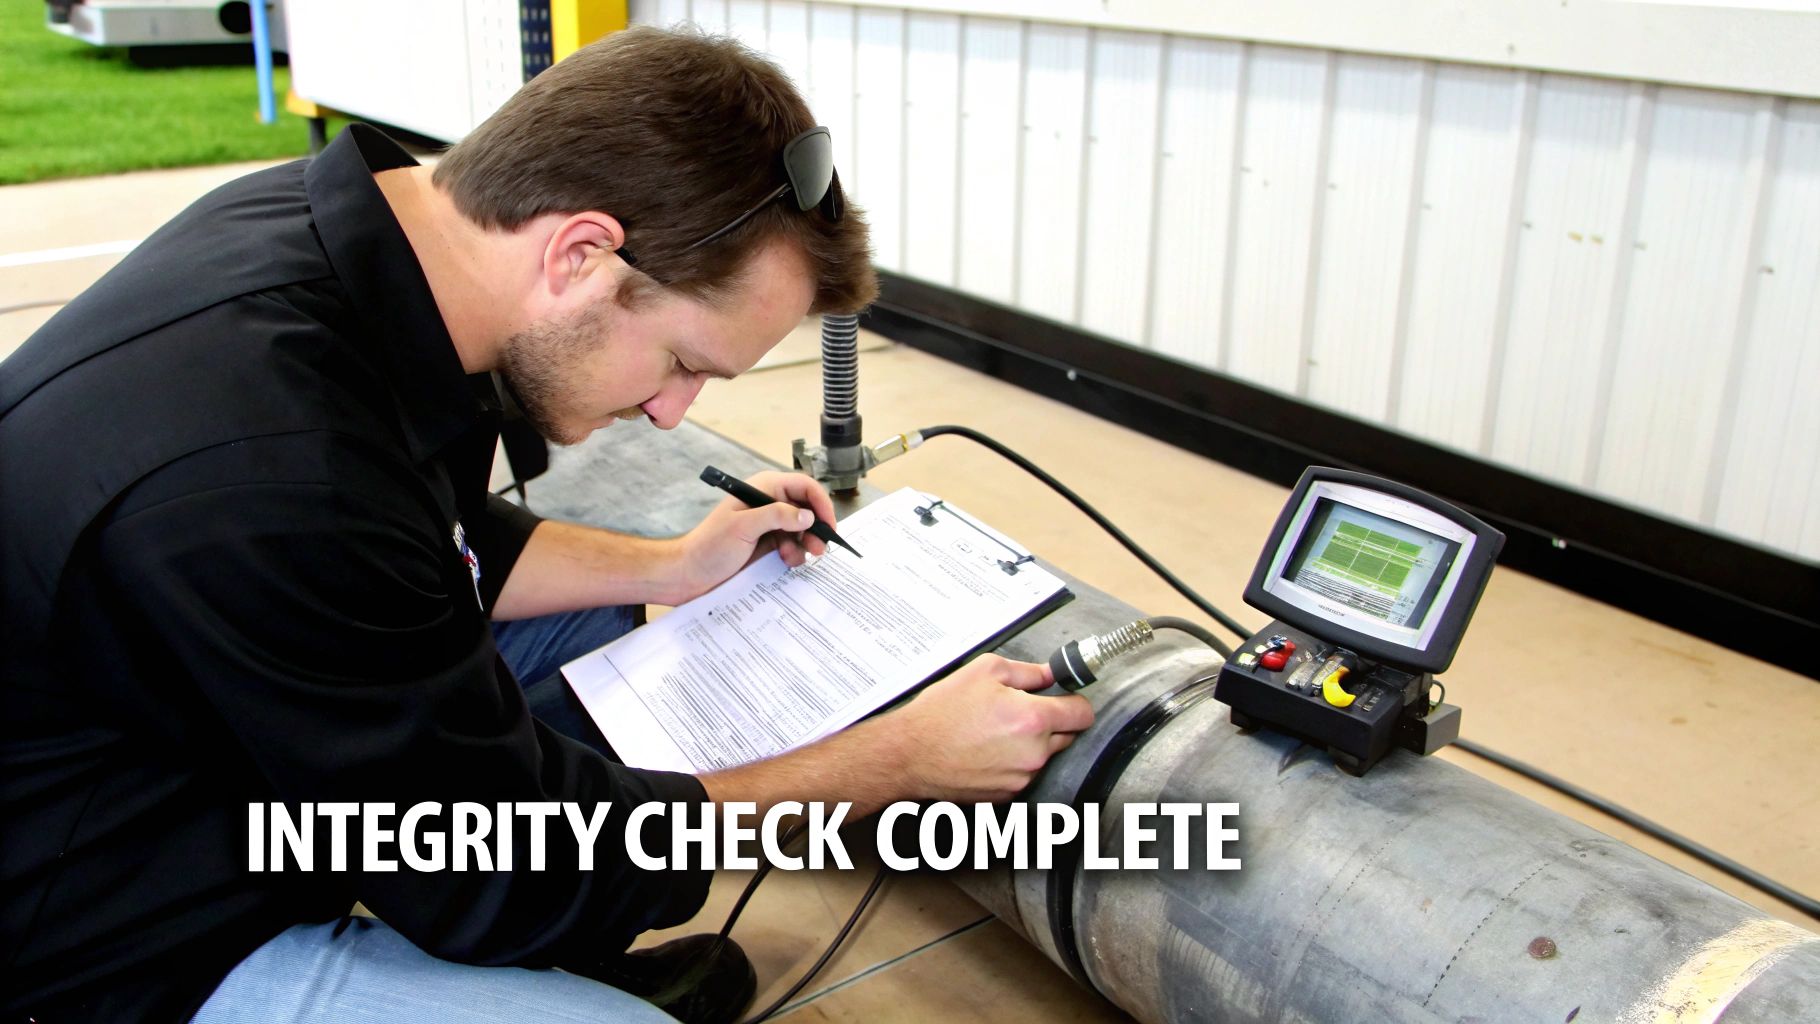
Confirming the Connection: Post-Tap Integrity Testing
Just because the tapping machine is off the pipe doesn't mean the job is done. In my experience, this next phase is where you truly earn your stripes. We've made the connection, but now we have to prove it's safe, sound, and ready for decades of service.
This isn't just a final check; it's a comprehensive quality assurance process. We're moving from the physical act of cutting to the methodical process of verifying every weld and component. You can't just hope for the best when dealing with high-pressure pipelines—hope isn't an engineering strategy.
Looking Inside the Welds With Non-Destructive Testing
Those welds holding the split tee to the main line are everything. A good welder lays a perfect bead, but what you can't see with the naked eye is what matters most. That’s where Non-Destructive Testing (NDT) comes in, giving us a crucial look inside the steel without leaving a mark.
We run these tests both before and after the tap to catch tiny flaws—the kind that can grow into catastrophic failures under years of pressure and vibration.
- Ultrasonic Testing (UT): Think of it as a high-tech ultrasound for steel. A technician slides a probe over the weld, sending sound waves deep into the material. By reading the echoes that bounce back, they can spot hidden problems like porosity or a weak bond between the metals. It’s an incredibly precise way to see what's invisible.
- Magnetic Particle Testing (MPT): This is a go-to for carbon steel. We magnetize the weld area and dust it with fine iron particles. If there's a surface or near-surface crack, it disrupts the magnetic field, and the particles literally flock to the flaw, making it clearly visible.
These aren't just box-checking exercises. They provide the hard evidence that our work meets tough industry codes like ASME Section IX.
The Final Gauntlet: Hydrostatic Pressure Testing
While NDT gives us a close-up of the welds, the hydrostatic pressure test is the ultimate trial for the whole assembly. We do this before making the actual cut, after the split tee and valve are fully installed. It's our chance to prove the fitting can handle more pressure than it will ever see in its life.
First, we isolate the new fitting and fill it completely with water. Then, a pump pressurizes the water to a level far beyond the pipeline's normal operating pressure. The standard is usually 1.5 times the maximum allowable operating pressure (MAOP).
This is a true stress test. We hold that immense pressure for a set time, often 10 to 30 minutes, while the crew meticulously inspects every single bolt, flange, and weld. We're looking for the slightest sign of a leak or any distortion. Passing this test is the final green light to start the hot tap.
Don't Forget the Paperwork: Verifying Material Integrity
Quality assurance starts long before we even get to the job site. Any reputable split tee fitting shows up with a full package of documentation, known as a Material Test Report (MTR). This paperwork traces the steel's journey from the mill to the finished product and proves its strength.
This documentation confirms the steel has passed a battery of crucial tests.
- Tensile Testing: A sample piece is pulled apart to measure its ultimate strength. This tells us it can handle the immense forces at play.
- Hardness Testing: This confirms the steel isn't too hard or too soft, which is especially critical in sour service environments where brittle materials can crack.
- Impact Testing: For lines in cold climates, this test ensures the material won't become brittle and fracture at low temperatures.
This layered approach—combining NDT, pressure testing, and material verification—is what makes the split tee hot tap procedure so reliable. The extensive testing standards for split tee fittings show just how deep the quality protocols run. When it's all said and done, you've built more than just a new connection; you've built a safe, durable asset for the pipeline.
Got Questions About Split Tee Hot Tapping?
Even the most seasoned pros have questions when it comes to a procedure as critical as a split tee hot tap. Things can get complicated out in the field, and knowing the "whys" and "what ifs" is what separates a smooth job from a potential disaster. Let's walk through some of the most common questions that come up.
What Are the Biggest Risks We Need to Watch For?
First and foremost, the biggest risk is always a loss of containment. That could mean anything from a pinhole leak to a full-blown rupture, and it usually traces back to a few critical points: a bad weld, the wrong fitting for the job, or a mechanical failure in the tapping machine itself. This is why following a certified Welding Procedure Specification (WPS) isn't just best practice—it's your most important line of defense.
Another major concern is what we call "punch-through." This happens when an operator gets too aggressive with the cutter and pushes it right through to the other side of the pipe. An experienced hand knows how to prevent this by listening to the machine and feeling the feedback. Of course, you also have the risk of ignition from welding heat or cutting friction, which is a huge deal depending on what's flowing through that line.
We manage these risks with layers of control, not just one single solution:
- Solid Upfront Planning: Double and triple-checking every material spec and operating parameter before a single tool comes out.
- By-the-Book Execution: Following the WPS and the manufacturer's steps without deviation. No shortcuts.
- Keeping the Flow: Maintaining a minimum product flow is crucial. It acts like a coolant, pulling heat away from the welding and cutting zone.
- Confirming the Work: Using NDT methods like ultrasonic testing (UT) and magnetic particle testing (MPT) to get a clear picture of the weld's integrity before you start drilling.
Can We Really Hot Tap Any Pipeline?
Not a chance. While hot tapping is an incredibly useful technique, it’s definitely not a one-size-fits-all solution. Some pipelines are simply off-limits because the risk is far too high. Think about lines carrying things like pure oxygen, chlorine, or certain highly reactive acids. The heat and friction from cutting could trigger a dangerous, uncontrollable chemical reaction.
Internally lined pipes are another no-go. If you have a system with a cement, plastic, or any other non-metallic lining, you can't hot tap it. The cutter would just shatter or tear that lining, sending a shower of debris downstream. That debris can easily wreck pumps, valves, and other expensive equipment.
The Golden Rule: The job always starts with a thorough engineering review. You have to assess the pipe's material, its current condition (verified with NDT, of course), what it's carrying, and its operating pressure. Only then can you determine if a split tee hot tap procedure is a safe and realistic option.
What Happens to That Piece of Pipe We Cut Out?
This is probably the question I get asked most often. The piece of pipe removed during the tap is called the "coupon." Letting that chunk of metal fall loose inside the pipeline would be a catastrophe waiting to happen—it could block flow or get lodged in a valve downstream.
Thankfully, tapping machines are designed with a pretty slick feature to prevent this. The pilot drill, which is the very first part of the cutter to break through the pipe wall, has a retention device built right in. Usually, it's a set of spring-loaded "U-wires" or a similar mechanism called a "coupon catcher."
Here’s a play-by-play of how it works:
- First, the pilot drill punches through the pipe wall.
- The moment it’s through, those U-wires spring open on the inside of the pipe.
- As the main cutter finishes the job, severing the coupon, the U-wires hold it tight.
- The coupon is now securely snagged on the pilot drill.
Once the cut is finished, the entire cutter assembly is carefully retracted back through the valve, bringing the coupon with it. Pulling out that coupon is the final proof of a successful, clean cut, and it's your guarantee that you haven't left any dangerous debris behind.
Facing a project delay due to natural gas line installation or maintenance? Blue Gas Express provides mobile CNG and LNG solutions to keep your operations running without interruption. Ensure you meet your deadlines and avoid costly downtime by visiting https://bluegasexpress.com to get a temporary gas supply delivered directly to your site.