

Installing a natural gas line is a serious project, and getting it right from the start is non-negotiable. It all boils down to meticulous planning—mapping the route, securing the right permits, choosing the proper materials, and following safety codes to the letter. Before any digging begins, you'll need to map the line's path, figure out the trench depth, assemble the pipe, and, most importantly, perform an air pressure test. Only then can a professional make that final, critical connection.
Planning Your Gas Line Installation for Safety and Success

Long before a shovel ever touches the ground, your project's success is decided in the planning phase. This is where you iron out the details, anticipate problems, and ensure everything is up to code. A solid plan is your best tool for a safe and efficient installation.
The very first thing to do is sketch out a detailed map of your property. It doesn't have to be a professional blueprint, but it needs to accurately show your property lines, buildings, and the exact path you envision for the new gas line.
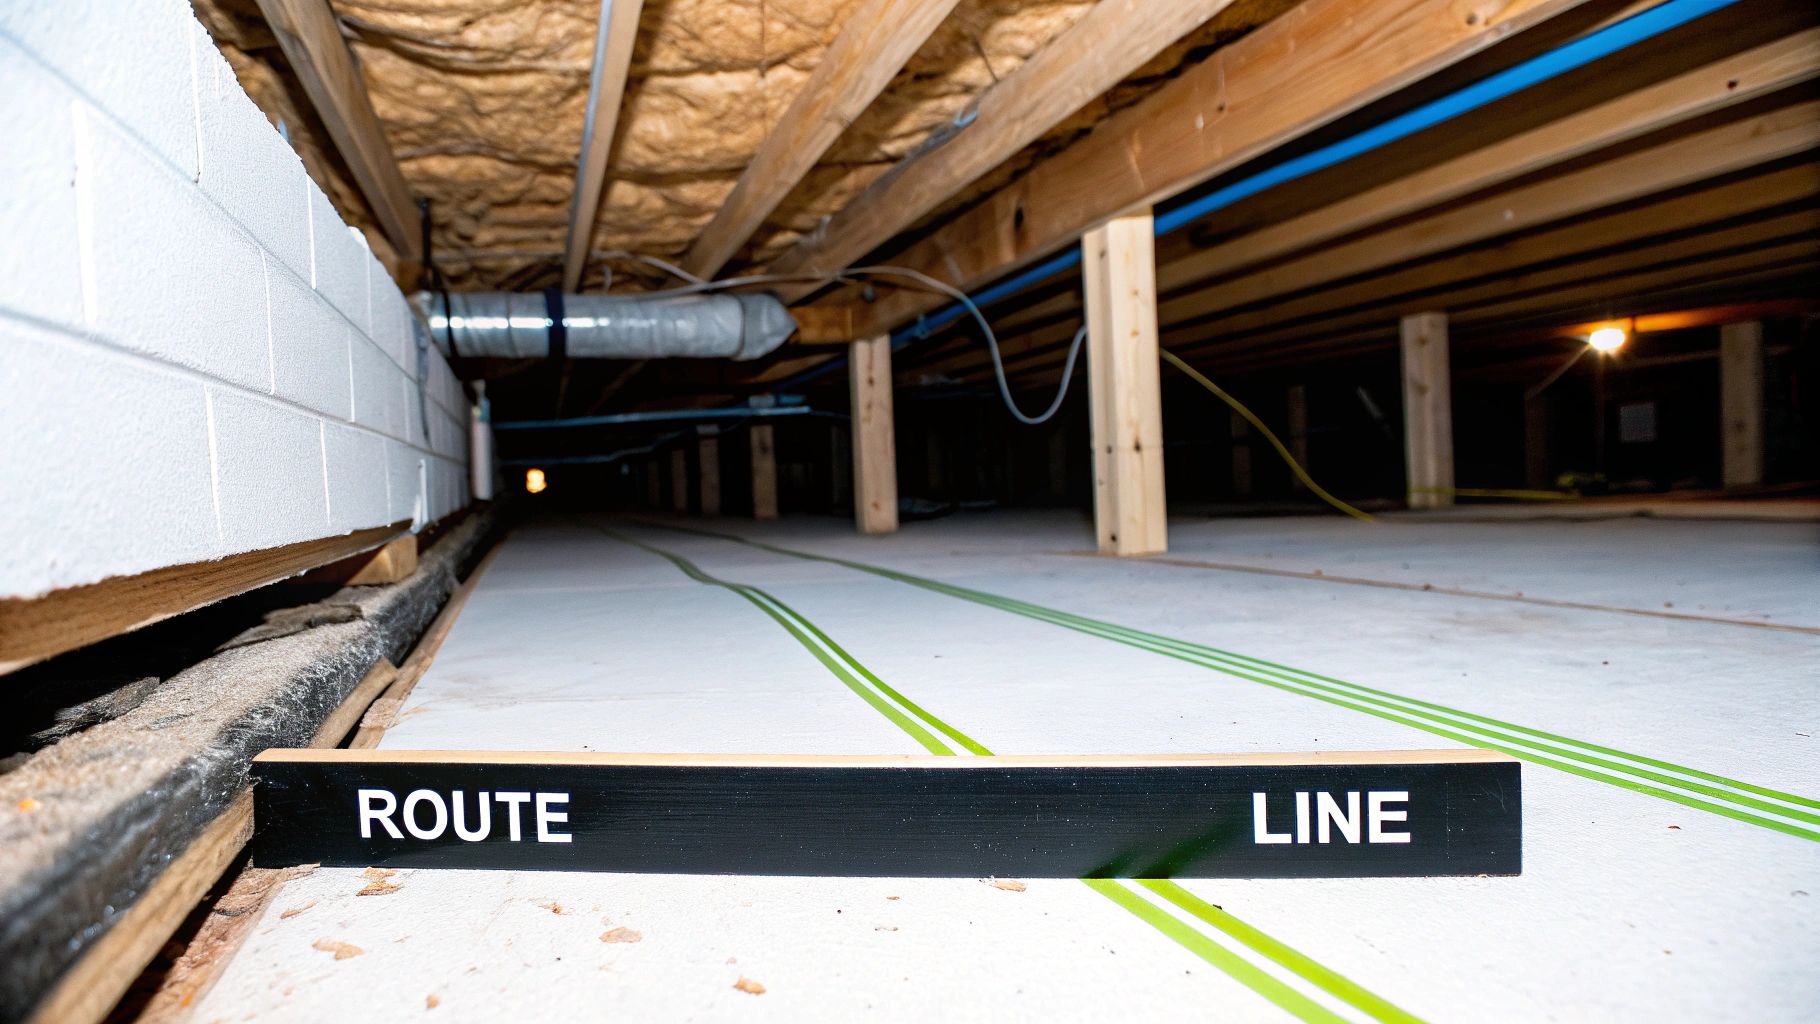
Mapping Your Route and Checking for Conflicts
Your site map needs a clear start and end point—usually from the gas meter to where the new appliance will be. As you draw the line, you have to think like a detective, looking for potential obstacles both above and below the surface.
Be on the lookout for:
- Existing Utilities: Water lines, sewer pipes, electrical conduits, and sprinkler systems are the usual suspects hiding underground.
- Landscaping Features: That beautiful old tree? Its roots can be a real problem for pipes down the road. Plan a route that gives them a wide berth.
- Future Projects: Got plans for a new deck or a shed? Make sure your new gas line won't be in the way when that project starts.
This simple sketch is more than just a drawing; it’s a communication tool. When you talk to the utility company or the local permitting office, this map shows you’ve done your homework and helps them understand your project, which can often speed things along.
A classic rookie mistake is just drawing the shortest line from A to B. From my experience, a slightly longer route that steers clear of a sewer line is always the smarter, safer, and ultimately cheaper choice.
Navigating Permits and Local Regulations
Let me be clear: contacting your local building department and the gas utility isn't optional—it's the law. They set the rules for everything from pipe materials and burial depth to mandatory inspections.
These regulations can vary dramatically from one place to the next. For instance, one town might insist on a 24-inch burial depth, while the next county over only requires 18 inches. Trying to skip this step is a recipe for disaster, leading to fines, failed inspections, and the nightmare of digging everything up to do it again.
The global expansion of natural gas infrastructure is a testament to how crucial standardized, safe installations are. With nearly 69,700 kilometers of new pipelines under construction worldwide as of late 2023, you can understand why local regulations are so strict. If you're interested, you can read more about the global growth of gas infrastructure and the challenges that come with it.
Choosing the Right Pipe Material
Picking the right pipe is a critical decision that hinges on where it’s going. For most jobs, you’ll end up using a combination of materials. The big three for residential work are black iron (steel), polyethylene (PE), and corrugated stainless steel tubing (CSST).
Each material has its place, and knowing the difference is key to a safe, durable system.
When choosing your materials, it's helpful to see a side-by-side comparison. This table breaks down the most common options you'll encounter for a residential project.
Gas Pipe Material Comparison for Residential Projects
| Material Type | Common Use | Pros | Cons |
|---|---|---|---|
| Black Iron (Steel) | Indoor piping, exposed runs | High durability, heat resistant, withstands high pressure | Heavy, requires special tools for threading, prone to corrosion if not protected |
| Polyethylene (PE) | Underground exterior lines | Flexible, highly corrosion resistant, cost-effective for long runs | Cannot be exposed to sunlight (UV degradation), requires special fusion or mechanical fittings |
| CSST | Interior runs, complex routes | Extremely flexible, easy to route around obstacles, requires fewer fittings | More expensive than steel, requires specific training for proper bonding and installation |
Thinking through this choice is essential. For a typical installation, you’ll probably use flexible PE pipe for the underground run from the meter to the house. Once you bring the line inside, you'll transition to either black iron or CSST to run the gas to appliances like your furnace or stove.
This hybrid strategy lets you play to each material's strengths, using them in the environment they were designed for. It’s a core principle of a professional installation.
Digging the Trench: Precision and Safety First
Now that you have your permit and a solid plan, it's time to get your hands dirty. Digging the trench for a gas line is a job that demands precision. We're not just digging a ditch here; we're creating a secure, stable, and code-compliant channel that will protect a vital utility for decades.
Before a single shovel hits the ground, you have one critical, non-negotiable task: Call Before You Dig. Seriously. In the U.S., just dial 811. This national service notifies all the local utility companies to come out and mark where their buried lines are. They'll use spray paint or little flags to show you what's lurking underground.
Ignoring this step is rolling the dice with catastrophic consequences. I’ve seen people hit water mains and create a muddy swamp, but slicing into an electrical line or, worse, another gas line is a life-threatening mistake. A few days of waiting for the utility crews is a tiny investment for your safety.
Getting the Trench Depth Right
With all existing utilities marked, you can start thinking about the trench itself. Your local building code is the law here, and it will specify the minimum required depth for your gas line. For most residential projects, this falls somewhere between 18 and 24 inches.
Why that specific range? It's the "just right" depth. It keeps the pipe safe from everyday activities like aerating your lawn, gardening, or even just the weight of foot traffic. At the same time, it’s not so deep that getting to it for future repairs would require a massive excavation.
Pro Tip: Keep in mind that the required depth is measured from the top of the pipe to the final finished ground level. So, a trench dug to exactly 18 inches isn't deep enough. It’s a small detail, but it’s one of the first things an inspector will check.
For instance, if your code calls for an 18-inch burial depth and you're using a 1-inch pipe, you'll need to dig deeper to accommodate the bedding material and the pipe's diameter.
Prepping the Trench Bed
You can't just toss the pipe into a dirt trench and call it a day. The long-term integrity of your gas line depends entirely on the bed you prepare for it. The bottom of the trench has to be perfectly smooth and free of anything sharp that could damage the pipe over the years as the ground settles.
You’re essentially creating a protective cushion for the pipe to lie in.
- Clear it Out: First, do a thorough sweep of the trench bottom. Get rid of any big rocks, sharp-edged stones, roots, or leftover construction junk.
- Lay Down Bedding: Next, add a 2 to 3-inch layer of clean sand or fine gravel. This creates a soft, uniform base that supports the pipe evenly.
- Level It: Use a rake to smooth out the sand or gravel. You want a consistent grade with no dips or high spots. An unsupported section can create a stress point, and a low spot can collect moisture, neither of which is good for the pipe.
Taking the time to do this right prevents a hidden rock from slowly grinding against the pipe, potentially causing a dangerous leak years from now. It’s a foundational step you absolutely can’t skip.
Dealing with Underground Surprises
No matter how well you plan, you're bound to run into a few surprises once you start digging. The most common obstacles are unmarked sprinkler lines and big, stubborn tree roots. If you come across a sprinkler line, you'll have to carefully expose it and decide the best course of action—either re-routing the sprinkler system or tunneling your gas line underneath it with plenty of clearance.
Tree roots are a different beast. You should never cut through a tree's main roots; it can destabilize or even kill the tree. The best approach is to simply route your trench around the root system. If you have no choice but to go under a root, dig deep enough to leave a generous gap. This ensures that as the root continues to grow, it won’t press down on and damage your new gas line.
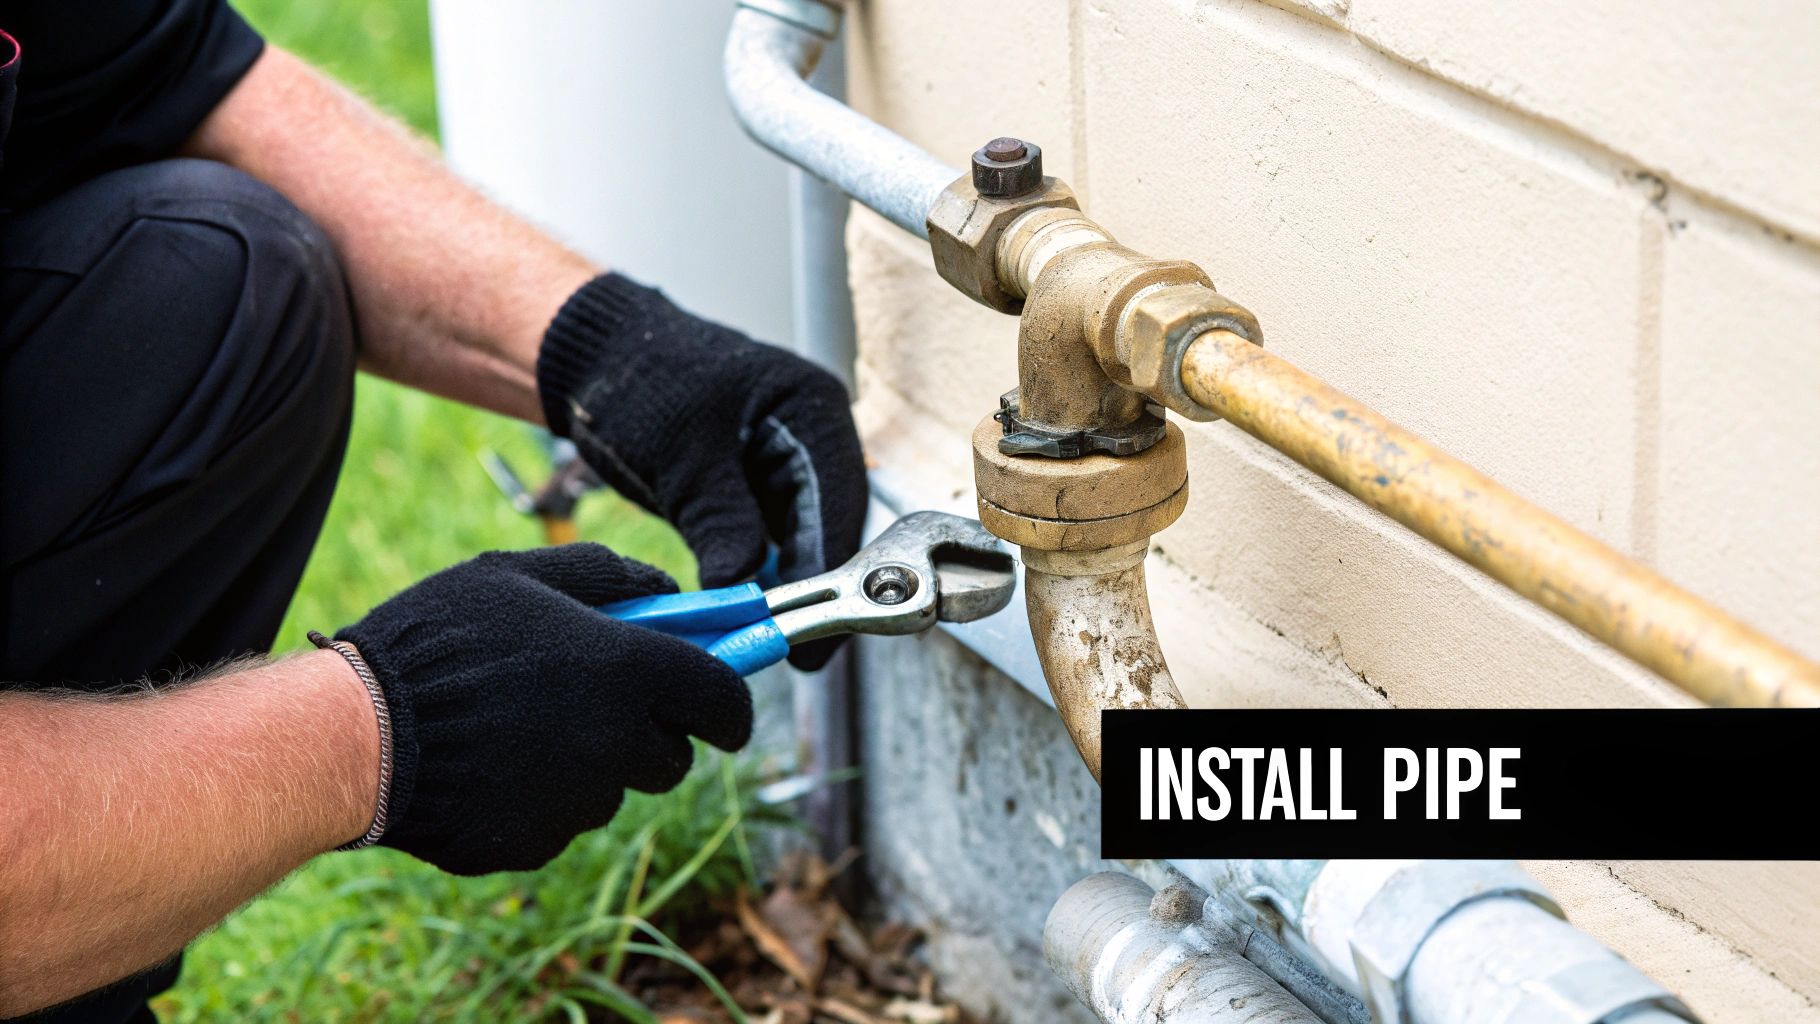
Putting It All Together: Assembling and Laying Your Gas Pipe
Once your trench is dug and properly bedded, it's time to get to the main event: building the gas line itself. This is where precision becomes paramount. Every cut, thread, and connection you make is a critical part of a system that needs to be absolutely perfect for the sake of safety and reliability. Your focus here isn't just about good craftsmanship—it's non-negotiable.
The way you install a natural gas line changes completely depending on the material you're using. Working with traditional black iron pipe is a world away from handling modern polyethylene, and you need to master the right technique for your chosen material.
This infographic breaks down the essentials for getting your materials and tools in order before you even think about making the first cut.
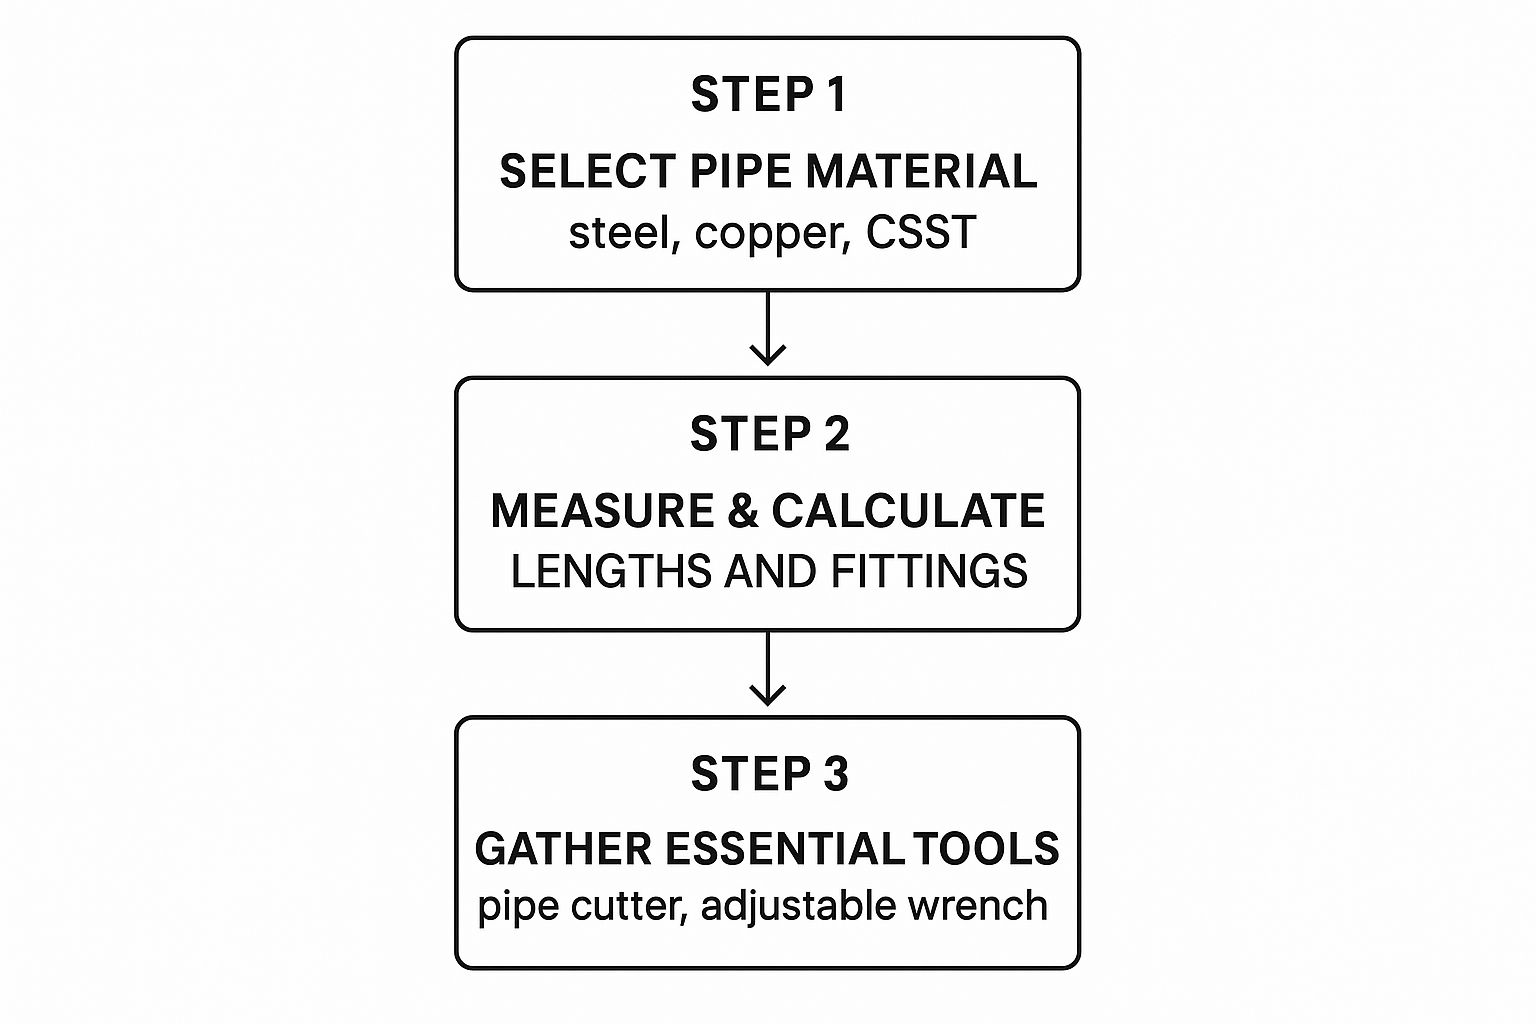
As you can see, a successful installation starts with solid preparation. That means choosing the right pipe, measuring twice (or three times), and having every tool you need within arm's reach.
Working with Black Iron Pipe
For any part of the gas line that will be exposed above ground, black iron (or steel) pipe is the go-to choice. Its strength and durability are unmatched in those situations. Assembling it correctly boils down to a few key skills.
First, you need to cut each segment to the exact length required. A good pipe cutter is your best friend here, as it gives you the clean, square cut necessary for a solid threaded connection. After cutting, you have to ream the inside edge of the pipe to smooth out any burrs or bits of metal left behind.
Next up is threading. Using a pipe threader, you'll cut tapered threads onto the pipe's end. This is what allows the fittings to screw on and create a seal that’s completely gas-tight.
When you're ready to join the pipes and fittings, you absolutely must use a proper sealant. This means a pipe joint compound (pipe dope) or Teflon tape specifically rated for natural gas. A pro tip: apply the sealant to the male threads only. This prevents any excess from getting pushed inside the pipe, where it could break loose down the line and clog an appliance valve.
Handling Polyethylene (PE) Pipe
For underground runs, polyethylene (PE) pipe is the industry standard today. It’s flexible, it won't corrode, and it's much easier to work with in a trench. But because it's plastic, the assembly methods are totally different from steel.
You'll typically join PE pipe using one of two methods:
- Heat Fusion: This is the preferred method for pros. It involves a special tool that heats the pipe end and a fitting simultaneously until they melt. You then press them together, and they fuse into a single, seamless piece of plastic that’s as strong as the pipe itself.
- Mechanical Fittings: These are compression fittings that create a seal by tightening a nut, which squeezes a gasket or ring against the pipe. They're great for situations like transitioning from PE pipe to a metal riser that comes out of the ground.
No matter which method you use, your cuts have to be perfectly square, and the pipe surface must be spotless—no scratches or gouges that could compromise the joint.
It's worth remembering that your single gas line is part of a massive, interconnected system. The global natural gas pipeline network is projected to stretch over 3.5 million kilometers by 2025. This staggering scale, which you can discover more about at Statista, underscores why every single connection, including yours, has to be made to exacting standards.
Laying the Pipe in the Trench
With a section of pipe assembled, it's time to carefully lower it into the trench. The goal is to have the pipe rest evenly on the sand or gravel bed you prepared. It's crucial that the pipe lies naturally, without any tension, bends, or stress on the joints.
You should never force the pipe to conform to a sharp turn in the trench. This is less of a problem for flexible PE pipe, but even then, let it lay in a gentle, sweeping curve instead of a tight corner. Before you place the pipe, do a final check for any rocks or clumps of dirt that may have fallen in.
Don't Forget the Tracer Wire
This last step is an absolute must if you're using PE pipe: installing a tracer wire. Since plastic pipe is invisible to standard underground locators, codes require a tracer wire to be buried with it.
It's a simple, insulated copper wire—usually 18-gauge or thicker—that you lay right alongside the pipe in the trench. Tape it to the pipe every 5-10 feet to keep it from shifting around. This wire gives future utility crews a conductive line to follow, allowing them to find the gas line without guessing. It’s a small step that provides a huge safety benefit for decades to come.
How to Conduct an Airtight Pressure Test
Before a single molecule of natural gas enters your new line, you have to prove it's completely sealed. This is where the air pressure test comes in, and it's easily the most critical safety check of the entire job. It’s not just a suggestion—it's a non-negotiable step required by code that validates the quality of your work.
Think of it as the final exam for your gas piping. A passing grade confirms every single joint is tight and the system has no microscopic leaks that could turn into a major hazard later. Don't rush this part. Your careful attention here is what ensures a safe installation.
Preparing the System for Testing
First things first: you need to completely isolate the new piping. Make sure it's disconnected from the gas main and any other live gas lines. Then, you have to cap off every single opening where an appliance will eventually connect.
This is a detail you can't afford to miss. Any open end will make it impossible to build and hold pressure. For black iron pipe, use threaded caps with a quality gas-rated pipe sealant. If you're using CSST or PE, grab the correct plugs to get a perfect temporary seal.
Your main tool for this is a pressure test gauge. It’s a simple rig, usually with a dial gauge, a tire-style Schrader valve to pump air in, and a fitting to connect to your pipe. You'll typically thread this onto an appliance stub-out or another accessible point where you can keep an eye on it.
I’ve seen projects fail inspection because a single, forgotten appliance stub-out was left uncapped. Before you even touch an air compressor, do a walkthrough and double-check every single endpoint. A few minutes of review can save you hours of backtracking.
Pressurizing the Line with Air
With the system sealed and your gauge installed, it's time to add pressure. Let's be crystal clear about one thing: you will only use air or an inert gas like nitrogen for this test—never, ever natural gas. Testing for leaks with a flammable gas is reckless, illegal, and incredibly dangerous.
Hook up an air compressor to the Schrader valve on your test gauge and slowly start filling the system. Residential gas lines operate under very low pressure, often less than 0.5 PSI, but the test pressure required by an inspector is much higher to ensure the system is robust.
A standard test pressure for residential work is around 10 to 15 PSI. But don't take my word for it; always check your local code for the exact requirement. It can and does vary by jurisdiction. Carefully inflate the line until the needle on your gauge hits that magic number.
The Observation Period and What to Look For
Once you've reached the target pressure, disconnect the compressor. Now, you wait. The duration of the test is also set by local code, but you can generally expect it to be between 15 and 30 minutes.
During this time, that gauge is your best friend. Watch it closely.
- A Stable Needle: If that needle doesn't budge for the entire test period, you're golden. Your system is airtight, and you've passed.
- A Dropping Needle: If the needle starts to fall, even just a little, you've got a leak. The test has failed, and it's time to go hunting for the source.
Even a drop of 1 PSI is a definite failure. It means there's a problem somewhere that needs to be fixed right away.
Finding and Fixing Leaks
If the pressure drops, your next task is to play detective. The old-school, tried-and-true method is still the best: a simple soap and water solution. Just mix some dish soap and water in a spray bottle until you have a nice, bubbly liquid.
Go back and generously spray every single joint, fitting, and connection you made. The escaping air from a leak will create obvious bubbles, pinpointing the exact spot of your problem.
Once you’ve found the culprit, completely depressurize the system. Take the faulty joint apart, clean the threads thoroughly, re-apply your sealant, and put it back together. After that, you're back to square one: you have to run the entire pressure test again until that gauge holds perfectly steady for the full duration. Passing this test is the definitive proof that your work is safe and ready for inspection.
Final Connections and Bringing Your Line into Service
You've done the hard work—the digging, the pipe assembly, the pressure testing. Now you're at the finish line, but this last stretch demands the same level of care as every step before it. It’s all about carefully backfilling your trench, making the last few connections, and then handing things over to the pros to safely bring your new line to life.
Don't get tempted to rush through this part. Protecting the pipe as you backfill and knowing exactly when to step back are what make for a safe, long-lasting installation.
Backfilling Your Trench Correctly
Once your work passes the pressure test and the inspector gives you the thumbs-up, it’s time to fill that trench back in. The entire goal here is to create a safe, stable home for the pipe, protecting it from any future damage.
You can't just shove all the dirt back in. The first layer you add is by far the most critical.
- Lay Down a Cushion: Start by carefully shoveling a 6-inch layer of sand or fine, sifted soil over the entire length of the pipe. This initial bedding is crucial—it ensures there are no sharp rocks, roots, or debris resting directly against your pipe.
- A Gentle Tamp: Lightly compact this first layer to secure the pipe in place and stop it from shifting. You don't need to go crazy here; just some gentle pressure will do the trick.
- Finish the Job: With that protective cushion in place, you can now backfill the rest of the trench with the original soil. As you go, make a point to pick out any large rocks or sharp objects from the dirt before it goes back in.
This careful approach to backfilling is what protects your hard work for years to come.
A common mistake I’ve seen is getting lazy at this final stage and just pushing all the dirt back in with a tractor bucket. This can easily crack a fitting or gouge the pipe, forcing you to dig it all up and start over. Taking an extra 30 minutes to backfill correctly is worth every second.
Installing the Riser
The riser is the key piece that bridges the gap between your underground polyethylene (PE) pipe and the heavy-duty steel pipe needed above ground. It’s basically an L-shaped fitting that brings the gas line up out of the dirt, ready for the meter or appliance connection.
Putting in the riser is straightforward, but it has to be done right. The mechanical fitting at the base needs to be tightened exactly to the manufacturer's torque specs to create a perfect, leak-proof seal on the PE pipe. You'll also want to make sure the riser is positioned precisely where it needs to be, is perfectly vertical, and is well-supported so there’s no strain on that underground connection.
The Professional Handoff for Final Tie-In
Let me be crystal clear on this point: the final connection to the live gas supply is a job only for the utility company or a licensed gas professional. There are no exceptions. Trying to do this yourself isn't just a bad idea—it's illegal in most places and incredibly dangerous.
Working with a live gas line takes specialized training, purpose-built tools, and a deep respect for the risks involved. There is zero room for error. This is where your job ends and the expert’s begins.
This division of labor is fundamental to the safety of our entire gas infrastructure. In the United States, the natural gas pipeline network stretches over 485,000 kilometers, making it one of the world's most extensive and highly regulated systems. These regulations dictate everything from burial depths to the rigorous testing every line must pass. You can discover more insights about these extensive safety protocols on Market.us.
When the utility technician shows up, they will have their own checklist to run through.
- They'll start by verifying your permit and inspection records.
- They will likely conduct their own pressure or leak test to be certain.
- They will then install the gas meter and connect it to the riser you installed.
- Finally, they will purge all the air out of your new line and slowly introduce the natural gas.
Once their work is done and they've double-checked that everything is safe, they will officially commission the line. At that moment, and only then, is your new gas line officially in service and ready to power your appliances.
Got Questions About Installing a Gas Line?
It's smart to ask a lot of questions before starting a project like this. We get them all the time. People want to know about costs, safety, and whether they can tackle it themselves. Getting straight answers is key to making good decisions and knowing when to call a pro.
Let's walk through some of the most common questions we hear from homeowners.
Can I Just Install a Natural Gas Line Myself?
This is always the first question, and it's a tricky one. Legally, in some places, a homeowner might be allowed to do the work on their own property. But just because you can doesn't mean you should.
Frankly, installing a natural gas line is not a DIY-friendly project. The stakes are incredibly high. One bad joint or an improperly sealed connection can create a leak, and that puts your home at serious risk of a fire or explosion. The pros go through years of training and certification for a reason—they know the codes, the right materials for the job, and the safety procedures inside and out.
Think of it this way: even if you're a talented DIYer and manage to get the line installed, it still has to pass a tough inspection. If it doesn't, you're on the hook to hire a licensed plumber to rip it out and do it right anyway. You'll end up spending more time and money than if you'd just called them in the first place.
What’s a New Gas Line Going to Cost Me?
The price tag on a new gas line can swing pretty wildly. As a ballpark figure, you might see costs ranging from $15 to $25 per linear foot, but that's just a starting point. Your final invoice will depend on a few things.
Here's a breakdown of what moves the needle on cost:
- The Run's Length: This is the biggest driver. A quick 20-foot stub-out for a gas grill is a completely different job than trenching 150 feet to a new workshop or pool heater.
- The Path of the Pipe: A simple, straight trench across your lawn is one thing. Having to work around a concrete patio, navigate thick tree roots, or avoid other buried utilities adds a lot of labor and complexity.
- Materials: Polyethylene (PE) pipe is common for underground runs and is fairly economical, but the final cost will include all the necessary fittings, risers, and interior piping.
- Permit Fees: Don't forget the local government. Permit and inspection fees can easily add a few hundred dollars to your project total before any work even starts.
What's the Difference Between Black Pipe and Yellow CSST?
Once you get inside the house, you'll typically see one of two materials. The old-school standard is black iron pipe. It's thick, heavy-duty steel that’s incredibly tough. The downside? It's rigid, a pain to haul around, and requires special threading tools to put together.
The newer option is Corrugated Stainless Steel Tubing (CSST). You can usually spot it by its yellow jacket (though sometimes it's black). CSST is flexible, which is its main selling point. You can bend it around corners and joists, which means fewer fittings and faster installation. It is, however, more expensive than black pipe and requires specific training to install correctly, especially when it comes to electrical bonding to protect it from lightning strikes.
Can a Gas Line Actually Freeze in the Winter?
It's a common concern, but the natural gas itself won't freeze in any winter you'll ever experience. What can freeze is moisture that gets trapped in the line. This is a bigger issue for propane systems, but it can happen with natural gas, especially at the regulator or in any low spots in the piping where water might collect.
A frozen blockage can choke off the gas supply, leaving your furnace or water heater dead in the water. The best prevention is proper installation and, in very cold regions, insulating any exposed regulators or pipes.
If you ever think you have a frozen line, never try to thaw it with a torch or a heat gun. That's a recipe for disaster. This is a job for a professional who can safely diagnose the problem and get your gas flowing again.